
weblogic开启https
JSK证书生成
生成密钥库和证书
使用Java的keytool命令来生成一个Java密钥库(Keystore)和证书。keytool是Java开发工具包(JDK)中用于管理密钥库和证书的命令行工具。
1 |
|
| 参数 | 含义 |
|---|---|
| -alias weblogic | 为密钥对指定一个别名 |
| -keyalg RSA | 指定密钥算法为RSA |
| -keysize 2048 | 指定密钥大小为2048位 |
| -validity 3650 | 设置证书的有效期为3650天 |
| -keystore identity.jks | 指定密钥库文件的名称 |
| -storepass storepass | 设置密钥库的密码 |
| -keypass keypass | 设置私钥的密码 |
导出证书
1 | []$ keytool -export -alias weblogic -file root.cer -keystore identity.jks |
| 参数 | 含义 |
|---|---|
| -alias weblogic | 指定要导出的密钥对的别名 |
| -file root.cer | 指定导出证书文件的名称 |
| -keystore identity.jks | 指定密钥库文件的名称 |
导入证书
1 | []$ keytool -import -alias weblogic -trustcacerts -file root.cer -keystore trust.jks |
| 参数 | 含义 |
|---|---|
| -alias weblogic | 为导入的证书指定一个别名 |
| -keystore trust.jks | 指定密钥库的名称和位置 |
| -trustcacerts -file root.cer | 添加证书至信任库 |
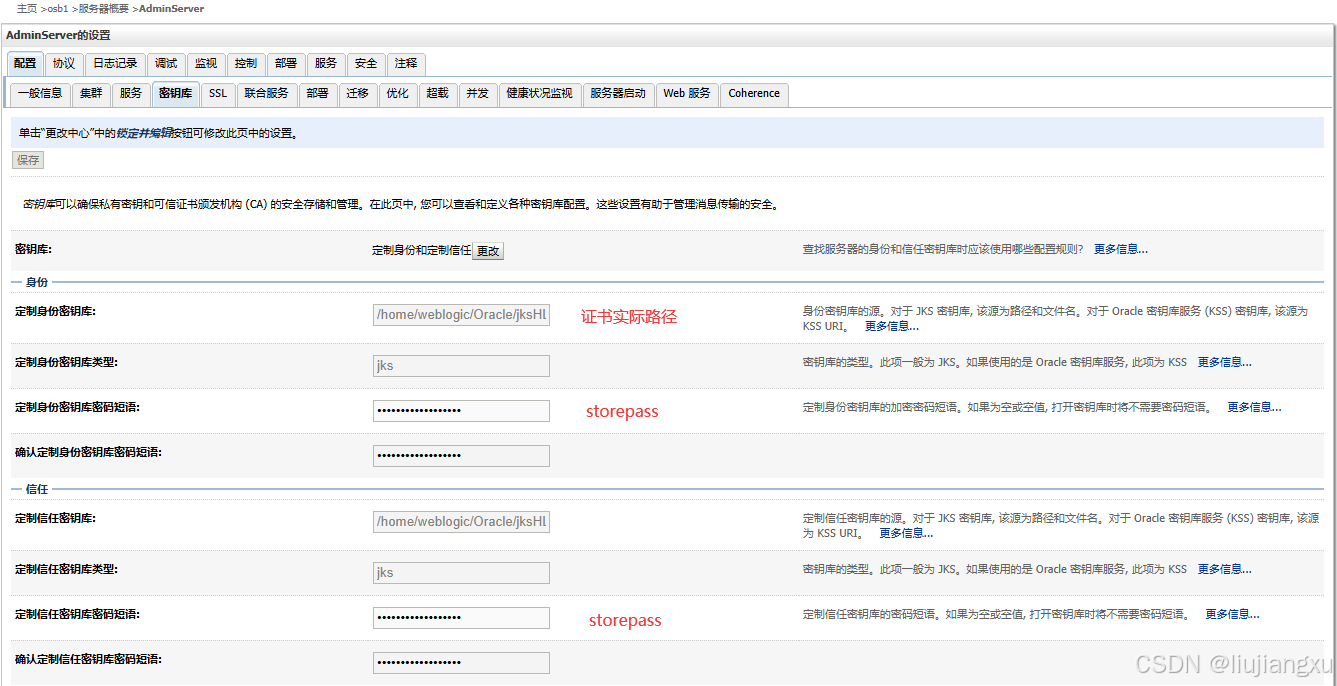
console启用ssl功能
密钥库
主页 ➔osb1 ➔服务器概要 ➔AdminServer
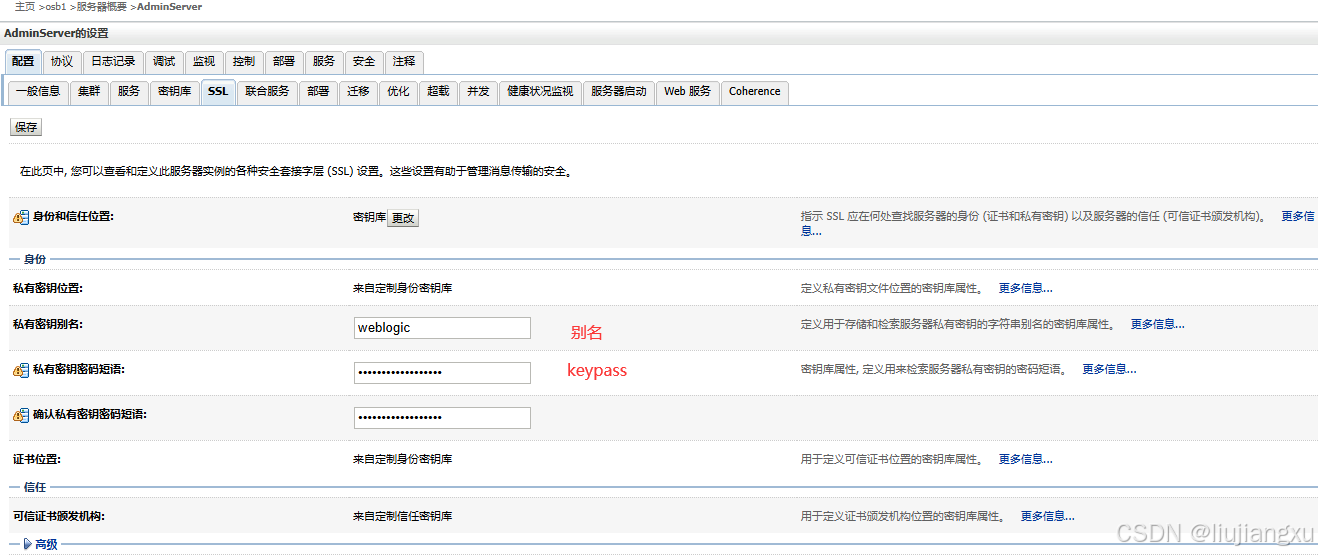
SSL
主页 ➔osb1 ➔服务器概要 ➔AdminServer
一般信息
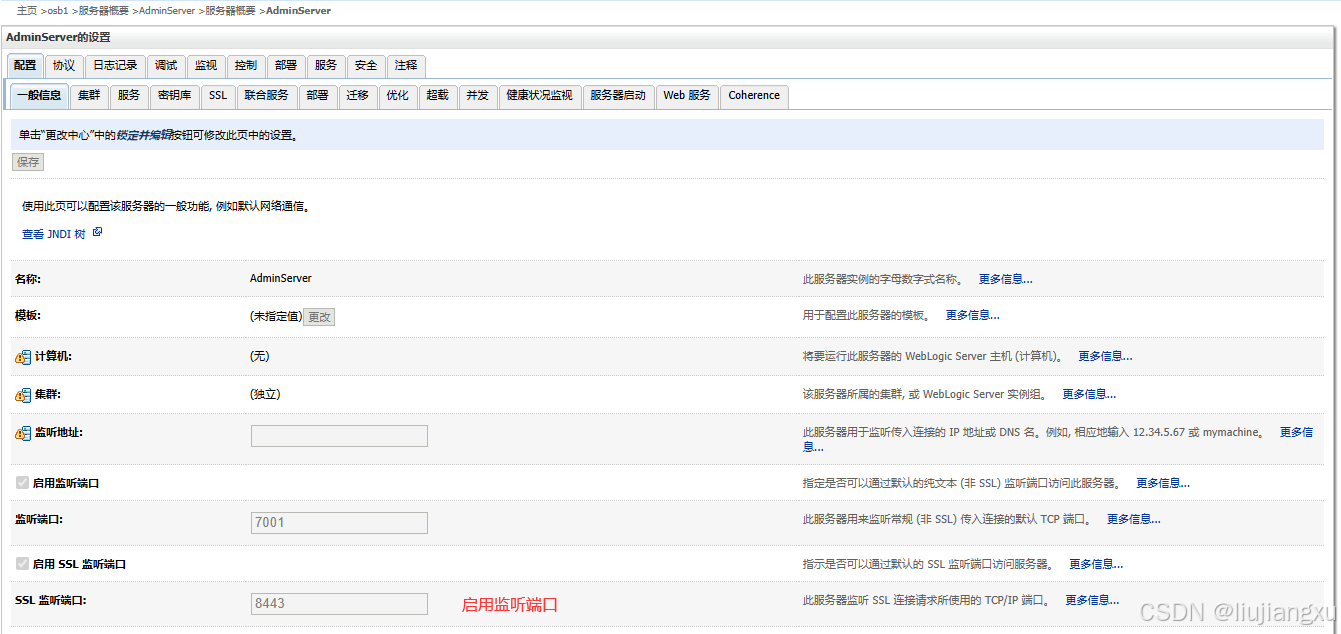
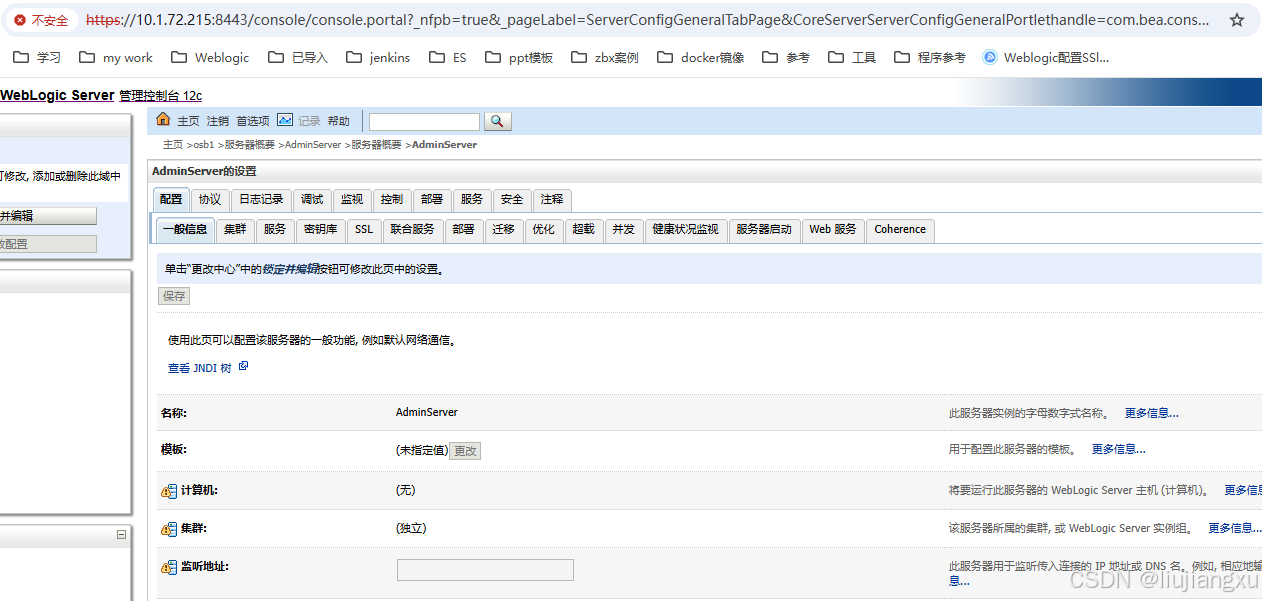
信息添后 ➔保存 ➔激活更改(不需要重启)查看服务器对应8443端口已监听 访问正常
nginx反代配置安全证书
自签CA
下载 mkcert 自签ca脚本
创建CA根证书(powershell)
PS C:\Users\ljx\Desktop> .\mkcert-v1.4.4-windows-amd64.exe -install
生成对应nginx IP证书
PS C:\Users\ljx\Desktop> .\mkcert-v1.4.4-windows-amd64.exe 10.1.74.23
查看根证书存放位置
PS C:\Users\ljx\Desktop> .\mkcert-v1.4.4-windows-amd64.exe -CAROOT
配置nginx
上传证书至服务器,修改文件后缀
1 | server { |
本地导安装根证书
将生成根证书rootCA.pem修改为rootCA.crt
双击安装证书
存储位置-》本地计算机
将所有证书都放入下列存储-》受信任的根证书颁发机构
至此本地自签https安全已完成
本博客所有文章除特别声明外,均采用 CC BY-NC-SA 4.0 许可协议。转载请注明来源 liujxu!
 wechat

相关推荐

2025-12-29
Elasticsearch8.11集群部署
集群就是多个node统一对外提供服务,避免单机故障带来的服务中断,保证了服务的高可用,也因为多台节点协同运作,提高了集群服务的计算能力和吞吐量。ES是一个去中心化的集群,操作一个节点和操作一个集群是一样的,任何一个节点出现故障都不会影响其他节点 安装ESES下载地址 目录结构 说明 bin 可执行脚本文件 config 配置文件 jdk es自带的jdk文件 lib 类库 logs 日志 modules 模块 plugins 插件位置 12345678910111213141516171819202122232425262728293031323334353637383940414243444546474849505152535455565758596061626364656667686970717273747576777879808182838485868788899091929394959697989910010110210310410510610710810911011111211311411511611711811912012112...

2025-12-29
Elasticsearch基础优化
分片策略分片和副本得设计为ES提供支付分布式和故障转移得特性,但不意味着分片和副本是可以无限分配,而且索引得分片完成分配后由于索引得路由机制,不能重新修改分片数(副本数可以动态修改) 一个分片得底层为一个lucene索引,会消耗一定文件句柄、内存以及CPU运转,当分片数越多资源消耗就会更多 每个搜索请求都需要命中索引中得每个分片,如果分片处于不同节点还好,但如果处于相同节点上竞争使用相同资源就导致性能降低 控制每个分片占用磁盘容量不超过ES得最大JVM堆空间设置(一般不超过32G),因此如果索引得总容量在500G左右,那么分片大小在16个左右即可 考虑node数量,一般一个节点有时就是一台物理机,如果分片数量过多,大大超过节点数,可能会导致一个节点上存在多个分片,一旦该节点故障,即使保持1个以上得副本,同样有可能会导致数据丢失,一般设置分片数不超过节点数得3倍 主分片,副本和节点最大数之间数量 节点数<=主分片数*(副本数+1) 推迟分片分配对于节点瞬时中断得问题,默认情况,集群会等待一分钟来查看节点是否重新加入,如果节点再次期间重新加入,重新加入得节点会保持...

2025-12-29
Elasticsearch基础增删改查
Elasticsearch是面向文档型数据库,一条数据在这里就是一个文档 倒排索引正排(正向)索引: ID content 01 my name is zhangsan 02 my name is lisi 倒排索引: keyword ID name 01,02 zhang 01 创建索引创建索引等同于创建数据库PUT具有幂等性,再次相同数据增加会报错 查询索引&删除GET 获取信息GET /shopping 1234#获取所有索引得详细信息GET /_cat/indices?v#删除当前索引DELETE /shopping 文档创建POST非幂等性 1234567891011121314#根据索引创建文档内容POST /shopping/_doc{ "名字": "张三", "年龄": 30, "职业": "工程师", "邮箱": "zhangsan@exa...

2025-12-29
Elasticsearch基础条件查询
条件查询query:查询match:匹配match_all:匹配所有 123456789101112131415161718192021#第一种GET /shopping/_search?q=名字:张三#第二种GET /shopping/_search{ "query": { "match": { "名字": "张三" } }}#全量查询 match_allGET /shopping/_search{ "query": { "match_all": { } }} 分页查询from开始计算公式:(页码-1) * 每页数据条数from:表示从第几行开始size:表示查询多少条文档 12345678910111213141516171819202122#查询从0行开始GET /shopping/_search...

2025-12-29
weblogic漏洞修复打补丁
序号 漏洞名称 加固建议 1 Oracle Fusion Middleware Oracle WebLogic Server组件安全漏洞(CVE-2017-10352) http://www.oracle.com/technetwork/security-advisory/cpuoct2017-3236626.html 2 Oracle Fusion Middleware和Oracle WebLogic Server 输入验证错误漏洞(CVE-2021-35617) https://www.oracle.com/security-alerts/cpuoct2021.html 3 Oracle WebLogic Server 安全漏洞(CVE-2023-21996) https://www.oracle.com/security-alerts/cpuapr2023.html … 补丁文件下载根据提示直接找最新的,官方补丁状况都是包含老补丁持续兼容更新 查找属于weblogic server 对应的内容 oracle weblogic server选择...